Texas Style Smoked Beef Brisket
On June 11, 2019 (Updated May 08, 2024)
This post may contain affiliate links. Please read our disclosure policy.
Texas Style Smoked Beef Brisket is more than a simple recipe, it’s a process for melt in your mouth smoked brisket. All you need is salt, pepper, smoke, and time, and you’re on your way to eating the best beef brisket of your life.
Smoked Brisket
I totally understand how intimidating it can be to smoke a huge, expensive brisket for the first time. That’s why I’ve tested and re-tested many different methods and recipes to help you achieve perfect results every time using a relatively simple process.
Once you try this juicy brisket, you’ll be itching for the next opportunity to smoke another one. BBQ (especially brisket) is something you have to learn by experiencing it yourself, so let’s jump in and give it our best go!
Tools Needed to Smoke Brisket
I have linked the products that I use when smoking my brisket below so you can see exactly what I’m using at home. Not all of these are necessary, but after smoking a bunch of briskets, I have found they make the job a lot easier!
- Smoker. I like to use my CampChef SmokePro, but any variety that can hold a steady temperature of 225 degrees F will work great.
- Large Cutting Board. You’ll need a big surface to slice your hunk of brisket on once it’s ready to serve.
- Meat Thermometer. The Thermapen Mk4 is the perfect thermometer for this brisket, but any reliable thermometer will do.
- Butcher Paper. This Texas style brisket is wrapped in butcher paper during the stall. You can pick up some Hey Grill Hey Peach Butcher Paper over at Patio Provisions today!
- Chef’s Knife. A good, sharp knife is necessary to slice your brisket. This Dahstrong Chef Knife is perfect for the job.
How to Smoke a Brisket
Smoking brisket isn’t hard, it just takes time, and lots of it! Follow the steps below to get the best smoked brisket of your life:
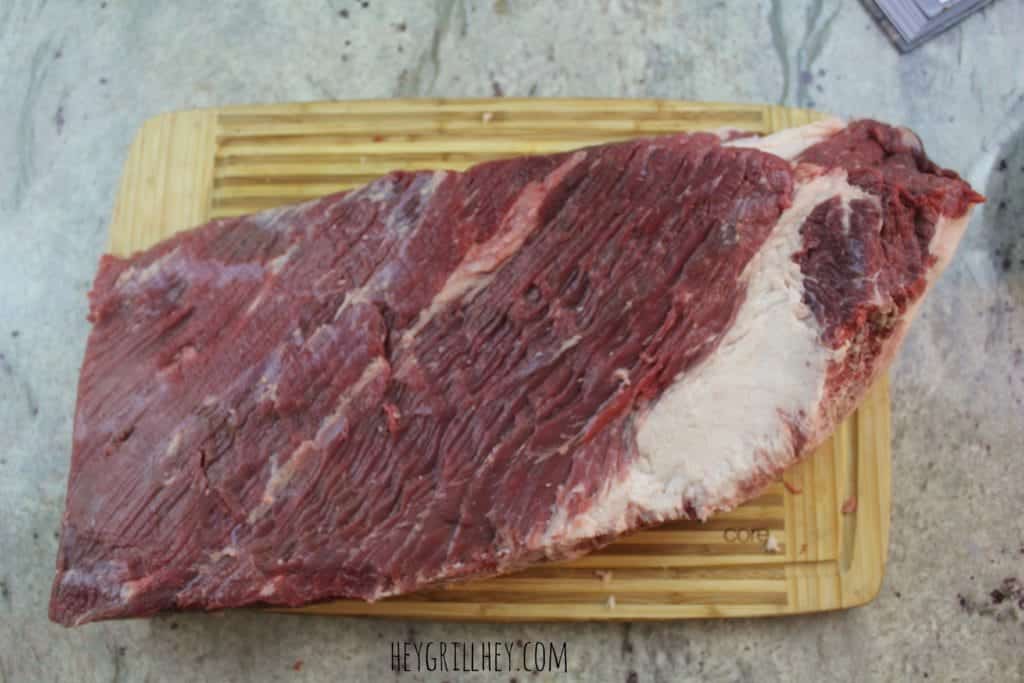
- Select your brisket. I have a full write up about choosing the perfect brisket in my Brisket 101 post. Here are the basics: Plan on purchasing a whole packer brisket with both the point and flat muscle included. The grade of your meat matters, prime beef will have more fat marbling. (This means more flavor and juiciness than a choice graded brisket!). Buy about 1/2 pound (or more) of brisket per person you are serving.
- Trim the brisket. Some Texans claim they don’t trim at all. At most of the top smokehouses, however, they do trim. This step is so important for how the final product will turn out. Spend the 20-30 minutes you need to trim it properly. I have step by step instructions (and pictures) for trimming your brisket in this post: How To Trim a Brisket. There is also a sped-up version in the video (below the recipe card) that will help you get a visual for a trimmed brisket.
- Season your brisket. Texas style is seasoned with only coarse salt and coarse black pepper. My only addition (and this is personal preference, you can skip it if you’re a purist) is to add garlic powder as well. It doesn’t really change the flavor or take away from that amazing smoked beef, but adds a little extra layer of goodness.
- Get Smoking! Use a nice hardwood in your smoker. I used oak as the base wood with a little bit of cherry mixed in. The goal here, whatever type of smoker you are using, is consistent heat and a steady flow of thin blue smoke.
- Wrap the brisket. This is one of the most crucial steps, in my opinion, to achieving that super juicy tender brisket with that killer dark caramelized bark. Opinions differ between using foil and peach butcher paper, but for this recipe I am fully converted to the butcher paper after years of using foil. My briskets have never had a better smoke flavor and a more delicious bark.
The brisket gets wrapped up like a present, folding edge over edge until it is fully sealed. Return the brisket to your smoker with the folded edges down and continue smoking at 225 degrees F until the internal temperature of your brisket reaches 202 degrees F at the thickest part (make sure your thermometer is in the meat, not fat).
- Rest your smoked brisket. DO. NOT. SKIP. THIS. STEP. Resting your brisket allows so many of those hot and bubbly juices to settle down a little and redistribute to the meat. It also brings your brisket down to perfect slicing and serving temperature.
- Slice your brisket. I have a full post about slicing your brisket HERE. You want to slice your smoked brisket against the grain for maximum tenderness. But remember! There are two overlapping muscles and two different grain directions. You can split the point and flat sections and slice each individually against the grain before serving but that sometimes leaves pieces with no bark on top. Traditional Texas joints split the brisket down the middle, as close as possible where to point overlaps the flat, they then turn the point 90 degrees and slice it that way and then finish slicing the flat the opposite way. You will have some pieces where they grain isn’t perfect but if your meat is tender enough it won’t matter too much.
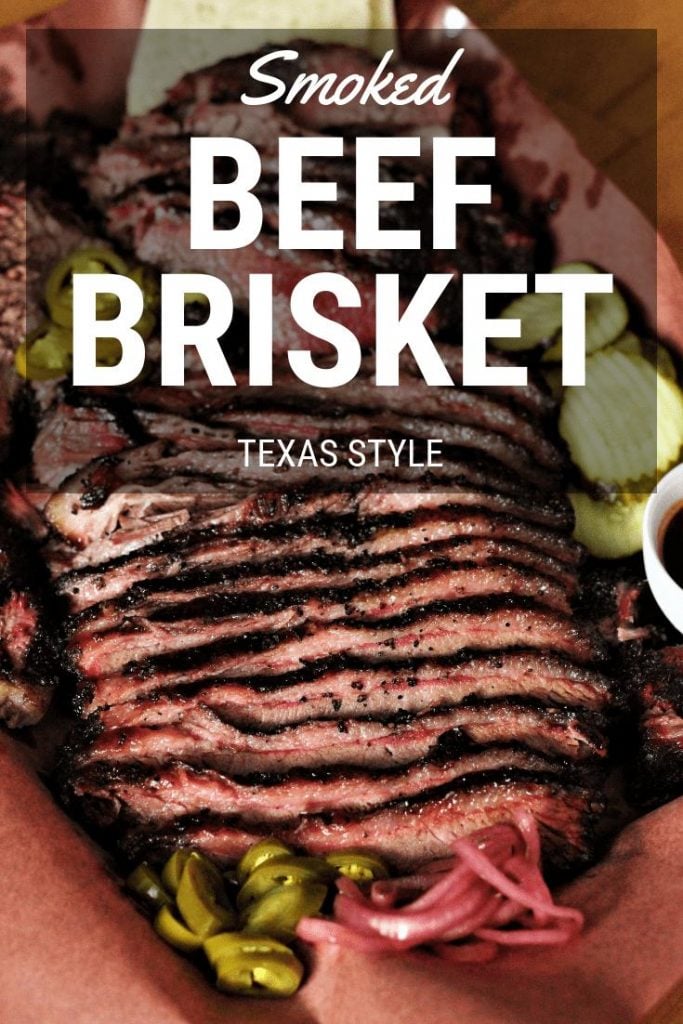
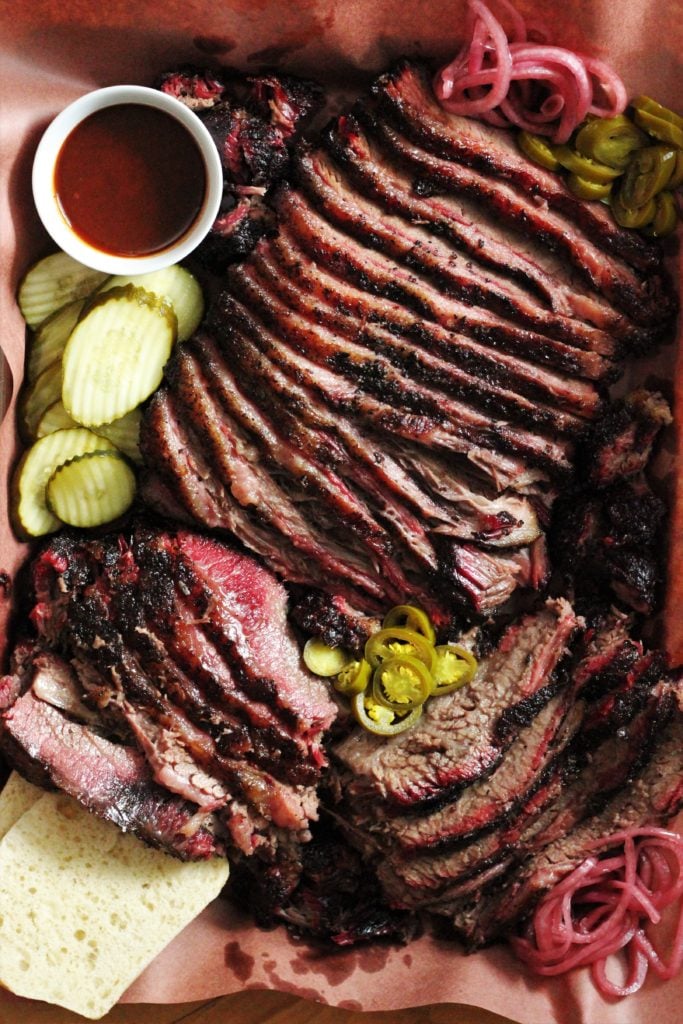
- Serve your gorgeously smoked brisket. In Texas joints when you order, you can request fatty or lean brisket. The fatty is the point and the lean is the flat. I like to tell my guests which slices are which so they can pick their favorite. The fatty is my personal preference, but I always grab a slice of the lean too because it has such an amazing smoke flavor! For an even more traditional experience, serve on a platter with butcher paper, lots of pickles, white bread, picked red onions, and pickled jalapenos. Sauce on the side. Always.
How Long to Smoke a Brisket
I wish I could tell you an exact time that smoking will take, but alas, that’s kind of the beauty of BBQ. It’s done when it is done.
For the initial smoke phase, I plan about 8 hours at 225 degrees F for my 12-13 pound briskets to reach 165 degrees F. However, your brisket will enter a phase in between 145 degrees F and 165 degrees F where the liquid evaporating from the surface of the brisket will cool it while your grill is trying to cook it. This is called the stall, and the time frame is different during this phase for every brisket I’ve ever cooked. This is where a good internal thermometer comes in.
The second phase (once it’s wrapped in butcher paper), can take anywhere from 5-8 hours. I usually plan an extra 2 hours for each of my brisket cooks because if it is done early, I can always set it in a cooler and allow it to rest for a while. If it is done late my husband gets hangry.
Bottom line: plan for anywhere from 12-18 hours to fully cook your brisket (this includes the initial smoke to 165 degrees and the wrapped smoke to get your meat up to 202 degrees Fahrenheit).
Tips for the Best Smoked Beef Brisket
Check out these pro tips to give you the upper hand when smoking your brisket:
- Mix your spices in advance. Mix your salt, pepper, and garlic in an old spice shaker container. Shake the spices out at about 2 feet above your brisket while seasoning. This will create a nice even layer of salt, pepper, and garlic across the entire surface of your brisket.
- Either side up cooks just fine! Many people argue whether you should cook your brisket with the fat side up or down when smoking. Guess what? I did two briskets, one up and one down. There was no difference in final product. Place it on there however you prefer!
- Don’t forget to rest! Resting your brisket is extremely important. I recommend resting your brisket for at least one hour. You can just leave it in the butcher paper and set it on a cutting board or baking sheet. If you need to rest your brisket for more than an hour, that is no problem! Simply wrap it in a towel (one you don’t mind sacrificing for tasty brisket) and set it in an insulated cooler. I’ve held briskets this way for up to 6 hours and they come out hot and perfect every time!
Variations for Smoked Brisket
Not all brisket methods are the same, and I often try different techniques to get the best results. Here are a couple of variations you can try:
- Slather! Some people like to use a binder to help the rub adhere to the brisket. My favorite is yellow mustard. This helps the seasoning stick, but the acidity also helps break down the surface of the meat and create a gorgeous bark. It’s not necessary, but worth a try to see if you like it!
- Wrap! I recommend wrapping in butcher paper, but foil is also an option. In fact, foil is the original Texas crutch to help push smoke dmeat through the stall. It’s still used in many BBQ joints. Your brisket may have a softer bark, but it will maintain a lot of moisture inside the meat itself.
- Temperature! I like low and slow for my briskets, but some people like the process to hurry a long a bit. You can try smoking at 275 degrees F to shorten the cook time. There’s no perfect formula to have a perfect time line, so keep an eye on the internal temp of your brisket.
Smoked Brisket Recipe
Watch the video below the recipe card and I’ll show you step-by-step how I make this smoked brisket at home. I’m on a mission to help you become the best backyard BBQer of your life, so head on over to YouTube, Instagram, or Facebook to get more recipes, videos, and tips from Hey Grill Hey. We can’t wait to hear from you!
Texas Style Smoked Beef Brisket
Video
Ingredients
- 1 12-14 pound whole packer brisket
- 2 Tablespoons coarse Kosher salt
- 2 Tablespoons coarse ground black pepper
- 2 Tablespoons garlic powder (optional)
Instructions
- Store your brisket in the refrigerator until you are ready to start trimming. Cold briskets are much easier to work with. Flip your brisket over so the point end is underneath. Remove any silver skin or excess fat from the flat muscle. Trim down the large crescent moon shaped fat section until it is a smooth transition between the point and the flat. Trim and excessive or loose meat and fat from the point. Square the edges and ends of the flat. Flip the brisket over and trim the top fat cap to about 1/4 of an inch thickness across the surface of the brisket.
- In a mixing bowl or empty spice container, mix the salt, pepper, and garlic. Share over the brisket to evenly distribute the spices on all sides.
- Preheat your smoker to 225 degrees F using indirect heat and hardwood smoke. Place the brisket on the smoker with the point end facing your main heat source. This is a thicker part of the brisket and it can handle the additional heat. Close the lid and smoke until and internal thermometer reads 165 degrees F (usually takes around 8 hours).
- On a large work surface, roll out a big piece of butcher paper (or foil) and center your brisket in the middle. Wrap the brisket by folding edge over edge, creating a leak proof seal all the way around. Return the wrapped brisket to the smoker, seam side down so the weight from the brisket crimps the edges of the paper wrap down tight.
- Close the lid on the smoker and, maintaining 225 degrees F, continue cooking until the internal temperature of the brisket reaches 202 degrees F in the thickest part of the meat (takes anywhere from 5-8 hours).
- Remove the brisket to a large cutting board and allow to rest for 1 hour before slicing. Slice both the point and the flat against the grain with a sharp knife and serve immediately.
Nutrition
Nutrition information is automatically calculated, so should only be used as an approximation.
**This recipe was originally published June 2017. It has since been updated and republished January 2019.
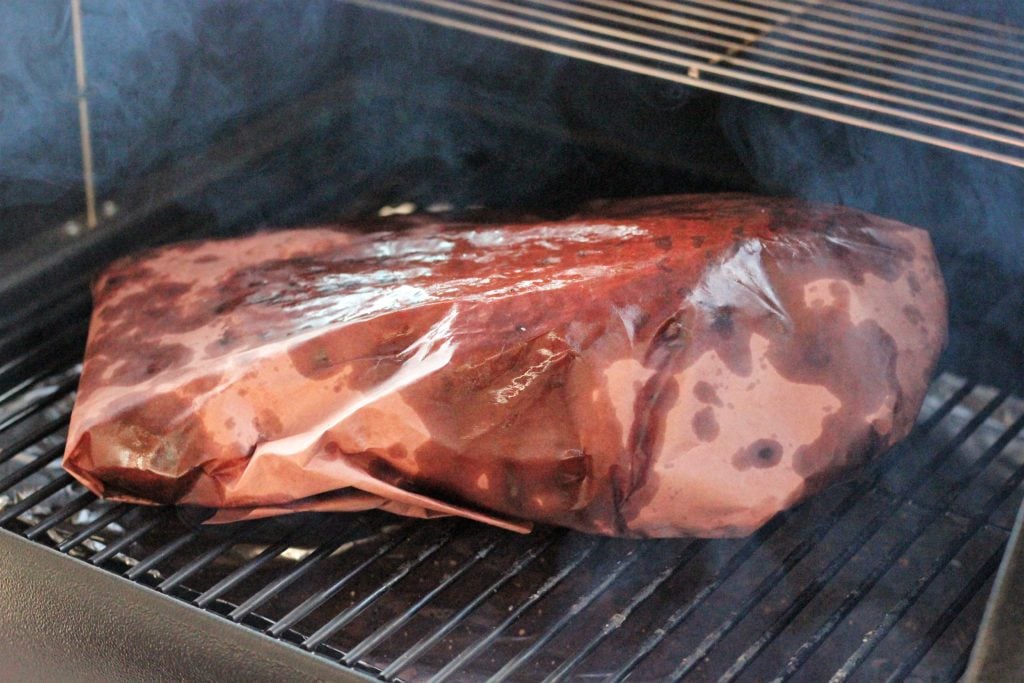 The brisket gets wrapped up like a present, folding edge over edge until it is fully sealed. Return the brisket to your smoker with the folded edges down and continue smoking at 225 degrees F until the internal temperature of your brisket reaches 202 degrees F at the thickest part (make sure your thermometer is in the meat, not fat).




First time cooking a brisket in the smoker. Our brisket was 17 pounds, so I cut it into three smaller portions. I used the tip cut this time around. I will make pastrami and corned beef out of the other cuts.
This recipe was really easy to follow. Wrapping the brisket in parchment paper at 165 degrees F was a great suggestion. I’ve never had such a tender and tasty brisket.
Amazing… I’ve tried different recipes and this one def stands out.
i tried printing the recipe and got huge squares of blankness. wasted like 30 sheets of paper and ink. kick rocks and fix your garbage. Stop being a slave to advertisement.
Tony, I’m sorry to hear you had trouble with your printer. All of our recipes have a print recipe button right at the top that gives you a clean, printable version of the recipe card free from ads. If you need help formatting your printer, let me know what model you have and I’ll send you a digital user’s manual.
Hilarious reply.
Why be such a dick??? Screenshot the recipe & no need for a printer. You oughta apologize to the lady for being so disrespectful!!!!
I hit temp after about 6 hours. Fully wrapped, it cooked at 300 deg for another 4 hours. Dang. The smoke ring was 1/4″ and it fell apart with a fork.
Fantastic recipe and instructions – thank you from a first-timer! I have a vertical smoker so ended up having to separate the flat and point for our 15 pounder to fit them in (and then used your awesome burnt ends recipe for half of the point!) Separating turned out to be a good decision for our smoker (Bradley electric), as the flat was done about an hour before the point. We rested the flat for two hours in a cooler with towels and the point for one hour in the cooler, so they were both ready at the same time. The other consideration for people with electric upright smokers is that you don’t really need to spritz nearly as much, due to the higher humidity level coming from the puck-catching water basin at the bottom of these smokers.The whole family loved it and all agree that, with the price of a 15lb brisket being pretty much the same as six 6 ounce tenderloins, it’s brisket every time!!
where do you live?
would follow that woman into battle. She is on point with her instructions. Followed direction as per video, results as advertised, lol.
BEGINNERS AND SEASONED BRISKET SMOKERS WILL FIND SOMETHING TO LEARN FROM READING YOUR RECIPE.
I follow this closely and turns out awesome. One thought is spritzing the meat every hour for the first 4-5 hours. I like using a mustard marinade I found at Costco.
I used a Traeger insulation wrap and my grill stayed more consistent and used less pellets BUT it cooked faster than previous briskets. Any tips for keeping it warm for 3 or 4 hours until I’m ready to serve?
I wrap mine up with blankets and put inside a cooler bring it in the house if it’s winter and just leave in the garage in the summer still steaming after 5 hours
I use a dedicated cooler: keep it wrapped in paper, insulate with some clean old towels and into the cooler. I’ve done that upwards of 2-3 hours
Wrap in a towel, not the fancy ones your wife has but something you don’t mind getting a little dirty and place inside a cooler. This will keep it hot and juicy for up to 5 or 6 hours depending on the quality of the cooler.
Wrap it in a towel and place it in a cooler. It will stay warm in the cooler for hours.
Once it’s cooked place it in an ice chest with a heating pad and lots of towels. This kept my brisket hot and ready for 8 hours
preheat your cooler with boiling water 30 minutes before. I usually use the hot bath water for most then do a gallon or so boiling off the kettle/stove. keep the lid shut, and double wrap in towels.
Put it in your cooler. Pre warm the cooler with hot water first. Empty the hot water the wrap your brisket in a towel inside the cooler.
I keep in wrapped in foil, add a towel around it and put in an ice chest It will stay warm 4-6 hours
Use a Yeti or similar brand Ice chest to store the meat in prior to cutting. You can maintain the temperature for a solid 2.5-3 hours with one of those style ice chests. Plus if you’re the not the one hosting you can bring it with you!
Been using this recipe for years. I might change my spices, but this process for dealing with the meat and how to cook it right has never failed me. TY Hey Grill Hey.