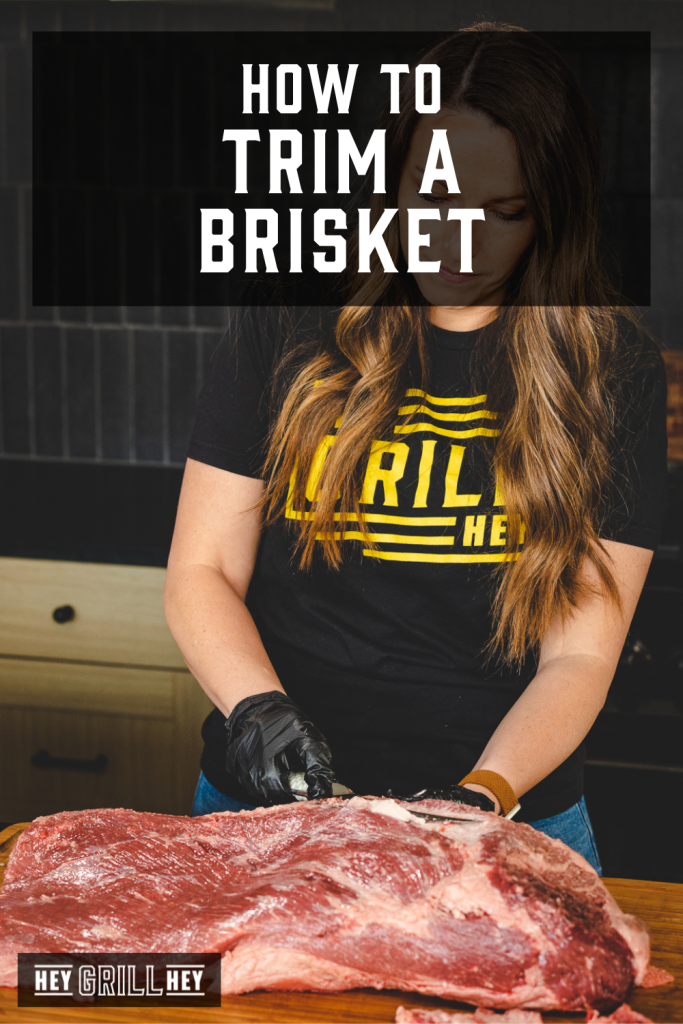
How to Trim a Brisket
On May 09, 2023
This post may contain affiliate links. Please read our disclosure policy.
Trimming a brisket is essential to getting the perfect smoke on your beef brisket. This step-by-step guide will teach you all you need to know on how to trim a brisket so it can be beautifully prepared before going on the smoker.
Trimming a Brisket
Hopefully, you read Brisket 101: What is Brisket? and have learned a little bit about what a brisket is, what types of brisket are available to you, and the best resources to get your hands on one! Now that you know enough to get started and (let’s presume) you have a fabulous 12-14 lb packer brisket of your very own, it is time to talk about how to trim a brisket!
Trimming is an essential part of any brisket because it affects the entire cooking process.
Too much fat on top? You won’t get a good bark or enough smoke penetration in your meat. Pieces of the flat that are too thin or too thick? There will be uneven cooking and you’ll end up with dry spots and burned edges. Dangling pieces of meat or fat leftover from the butchering process? Crisp and charred chunks that you’re just going to have to throw out anyways. Have I made my point yet?
If you can’t tell, I think trimming is a crucial step in the brisket game, so do it well! How you trim your meat affects how it cooks and ultimately how well it is sliced and served. Don’t stress yourself out about it though! If you trim a little too much or not enough, guess what? Your brisket will turn out just fine. Just take notes and try again.
I didn’t trim the perfect brisket my first time and you probably won’t either. Brisket is a cut that requires a lot of practice and patience, but there is always the reward of amazing-tasting meat at the end.
Tools Needed for Trimming Brisket
There are a few tools that I find extremely helpful when trimming a brisket. Granted, you don’t need to rush out and grab these exact items prior to trimming your brisket, but I can guarantee you’ll find the trimming process easier with some good tools.
- Powder-free nitrile gloves. Whenever I know I’m going to be doing a lot of handling with raw meat, I like to wear these nitrile gloves. They help me grip the meat better and I can throw them away when I’m all done preparing my meat.
- Fillet knife. I absolutely love this Shun Classic Boning and Fillet Knife. I’ve trimmed briskets before with my chef’s knife, and while it gets the job done, it takes me almost twice as long with a large knife. Using a fillet knife will help you get nice,
thin cuts with ease. - Wooden cutting board. Briskets are BIG, man. You’ll need a large surface to trim your brisket, and I recommend using a Large Wooden Cutting Board so you’re not having to adjust your brisket the whole time you’re trimming.
How to Prepare Brisket
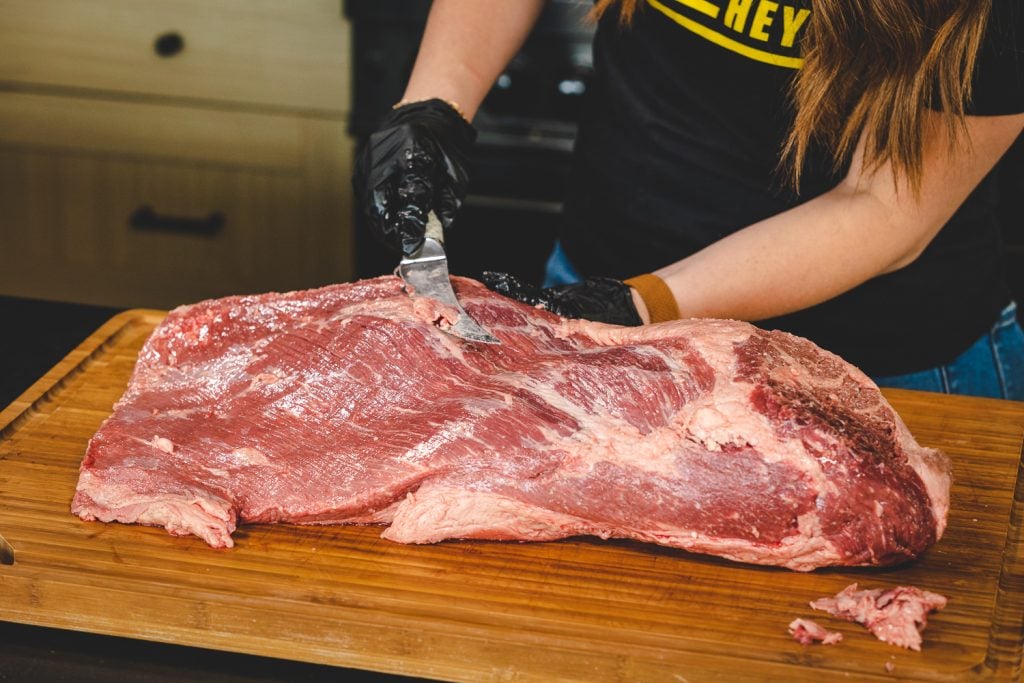
So now that I have made you sufficiently nervous/excited/self-confident let’s get down to business! Your brisket will come wrapped in big plastic packaging. You’re going to need a huge cutting board (OK fine, I need a huge cutting board as my biggest cutting board could barely contain this bad boy).
Remove the plastic packaging and take a look at your brisket. You’ll see a large layer of fat (called the fat cap) across the top of your brisket. Flip it over and you’ll see mostly exposed meat with some silver skin and another large knob of fat.
The long, thin, rectangular side of the brisket is your flat. The knobby, muscly, angular end of the brisket is your point. Now that you’re oriented to the meat, it’s time to get to business. Go ahead and grab your favorite knife. It should be about 7-8 inches long and super sharp! It’s time to trim!
How to Trim a Brisket
Alright, folks. It’s time to dive in and get your brisket trimmed and ready for the long smoke. Follow along with these 5 easy steps to get your brisket prepped and ready to go.
Step 1: Trim the Underside of the Brisket
This is a completely optional step, but I find it helps to even out my brisket and prep it for a more even smoke (meaning good bark all the way around). If you’re not into trimming the underside, feel free to skip this step and head to step two.
If you’d like to trim the underside a bit, follow along! Place the brisket fat cap down and lightly trim the fat and excess silverskin of this side of the brisket.
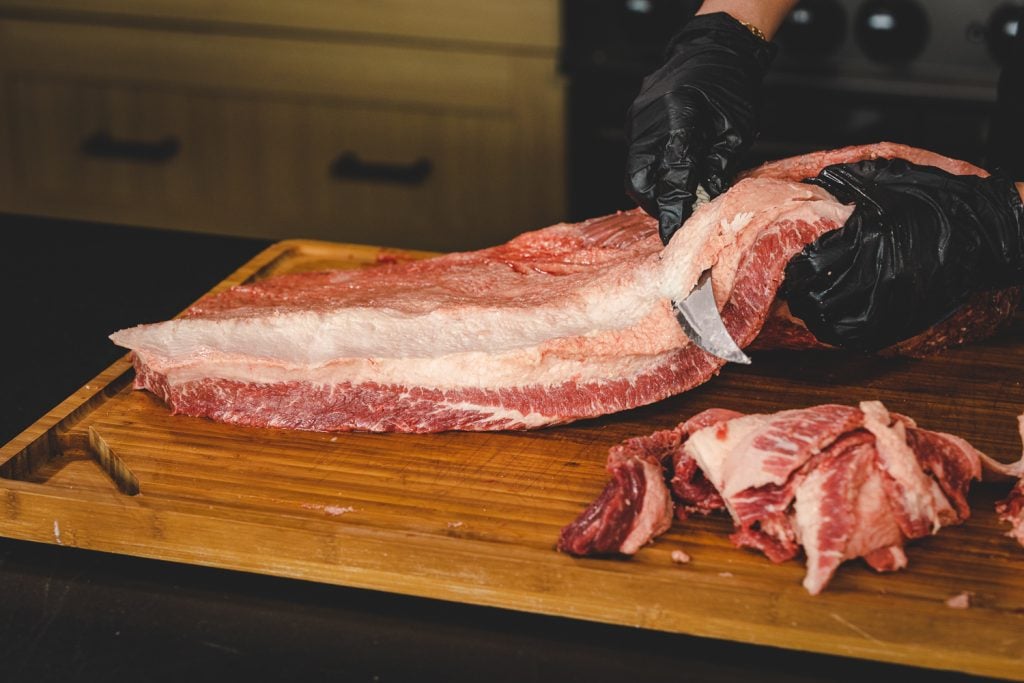
Step 2: Remove the Fat
Look at the point. You’ll see a large, almost moon-shaped, piece of pure fat. Using your free hand, work your fingertips into the inside edge of that fat piece. Lift it up while you slide your knife in between the brisket and the fat. Work your knife back and forth (in a sawing motion) while simultaneously lifting the fat piece with your hand. You can see me gripping this piece of fat in the picture below. Remove this entire piece of fat.
Once you’ve removed the majority of this large piece of fat, use your knife to level it off with the rest of the brisket. You don’t need to cut this whole chunk of fat out of the brisket and leave a crater. Most of this will cook down and melt away, but you want uniformity across the bottom of the brisket for better cooking.
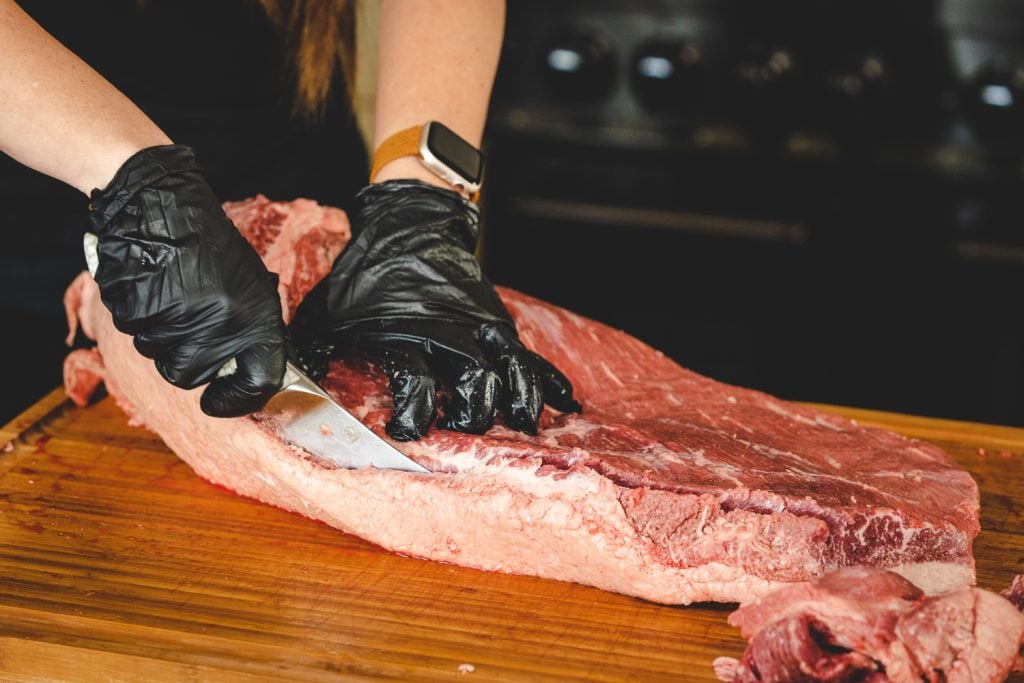
Step 3: Square the Brisket
Start by trimming a long thin section off of each side to square off your brisket. When it comes to trimming, don’t get crazy and start hacking stuff off. Be a minimalist first, you can always take more away but you can’t put meat back on. Once your sides are smooth and uniform, move to the ends. Your point will look really knobby and absolutely NOT uniform. This is OK. Trim off any excess or loose pieces of meat or fat that could burn during the cooking process.
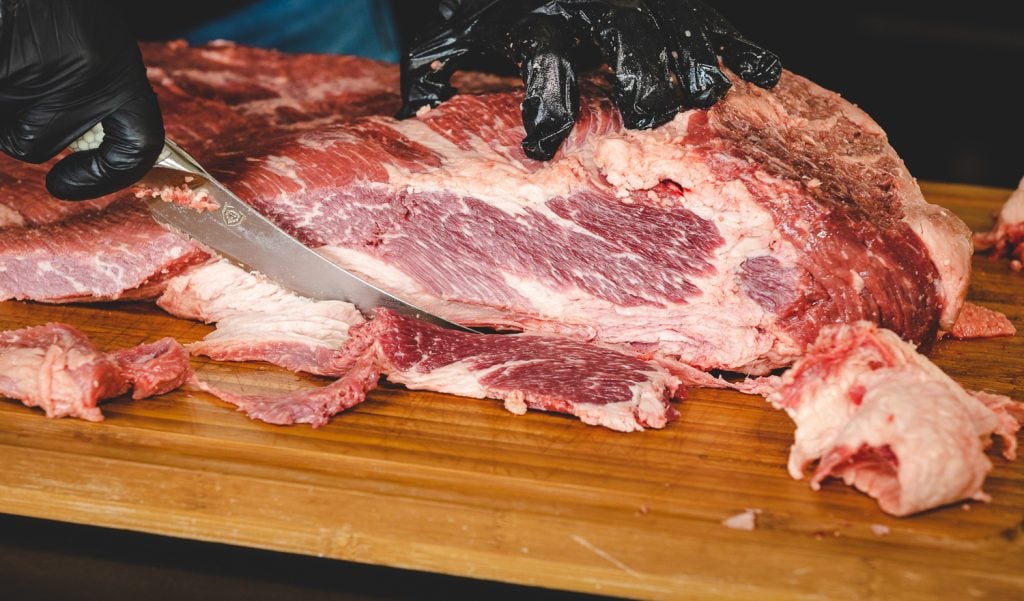
Step 4: Trim the Skin and Remaining Fat
Now use your knife to remove any of that thick shiny looking skin and also any remaining large fatty pieces. Head to the flat and trim the corners so they are a little more rounded. This will prevent those corners from drying out, crisping up, and burning. You did it!! The under side of your brisket is well-trimmed and beautiful like the picture below!
Step 5: Trim the Fat Cap
Pick that beauty up and flip her over so the fat cap is again on top. I like to kind of hunch over and get on eye level with my brisket for this next part. Using your super duper sharp knife, trim the fat cap down to approximately 1/4-1/2 inch thick.
This is not an exact science, but by looking at your brisket from the side, you can start to see where the fat is thicker and needs a little trimming and where it is thin enough to let it be. I also pay attention to my beautifully squared sides because sometimes flipping it can redistribute weight and now they are not so square anymore.
Most briskets will have a section of the point that tapers off and looks like a thin flap of meat with fat above and below. Some brisket cooks trim this flap off entirely to create a more uniform top of their brisket. Others leave it on and enjoy the thin crispier edges as a snack while slicing. This one is pitmaster’s choice. I removed mine in the picture below.
Step 6: Last Call for Trimming!
If you are cooking a Hot and Fast Brisket application, I recommend taking out more fat between the flat and the point. The reason for this is because when cooking a brisket hot and fast there isn’t as much time for the fat to render down. Work your knife in between the two pieces of meat and lift the flat away while following the fat. Once you’ve separated the flat and point a bit, trim away some of the extra fat between the two. Make sure to check out the video for visual help on how much fat to remove.
Lastly, give your brisket an extra once over with your eyes and feel it with your hands. It should look fairly uniform at the flat and well-trimmed without any weird pieces that could easily burn sticking out at the point. You got it?! Way to go! You have successfully trimmed a brisket and are ready for the next step: smoking!
Brisket Recipes from Hey Grill Hey
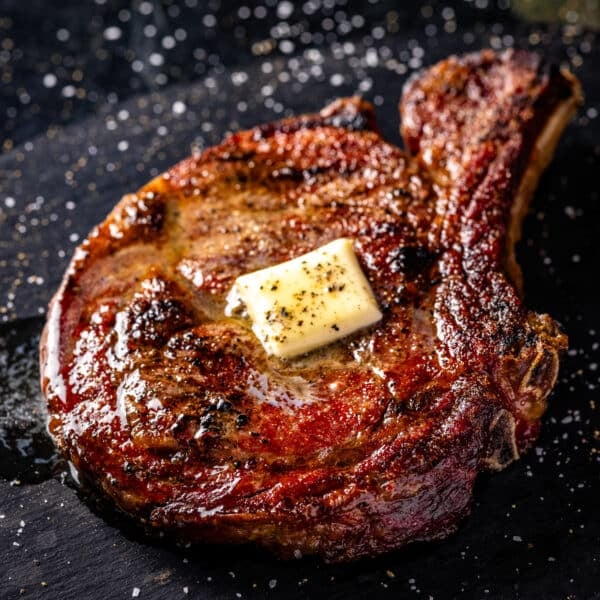
Now that you have your brisket trimmed to perfection, try your hand at some of my awesome brisket recipes:
Let’s make something delicious! I’m all about helping you make better BBQ, feed the people you love, and become a backyard BBQ hero. Share any questions you’ve got in the comment section or tag me in your brisket trimming success on Facebook, Instagram, or Twitter!
This post was originally posted in May 2015. It has been updated with new images and more current information.


In previous cooks I found that the flat was overcooked (dry) while the point was good. Your demo of how to remove the fat between point and flat will help going forward. One question that I don’t think you’ve touched on: how to determine which way the grain runs in the flat and how to mark it so that when cutting after the smoke you are getting a good cross-grain slice.
On another note, will be trying your Apple Jalapeno ribs this week; looking forward to it.
Watched your brisket-fat trimming video and learned a ton, it is well done and extremely helpful for us first timers! Smoked our first brisket overnight for my 4th of July Birthday. Used your prepping and smoking advice and used peach butcher paper to wrap brisket after it hit 165 degrees. Rested for several hours following smoking wrapped in a cooler. It was amazing and a big hit at the B-Day Bash. Can’t wait to smoke Brisket #2!
I need to smoke smaller briskets. Maybe in the 8lb range. What are the secrets to smoke smaller briskets?
The time of your smoke depends a lot of the weight of your brisket. Make sure you plan on 35-40 minutes per pound and check your temp with a reliable meat thermometer regularly.
Loved the video so helpful thank I learned a lot. Looking forward to watching your other videos. Thank you