Controlling Temperature on a Charcoal Grill
On June 14, 2023
This post may contain affiliate links. Please read our disclosure policy.
Today we’re dropping some BBQ-based knowledge bombs. I’m thrilled to share my knowledge and experience on preparing and maintaining a charcoal-based fire in your smoker. We all know that the secret to mouthwatering BBQ lies in the fire, so let’s dive right in and learn how to create and control the perfect heat for that smoky goodness.
Before we get started, let me assure you that mastering the art of charcoal-based fire is not as daunting as it may seem. If I can do it, so can you. With a little practice, you’ll be able to maintain consistent temperatures and achieve BBQ perfection every time.
Choosing the Right Charcoal
When it comes to selecting charcoal for your smoker, you have two primary options: briquettes and lump charcoal. Briquettes are uniform in size and burn consistently, while lump charcoal is made from natural wood and burns hotter and faster. Both options have their advantages, so choose the one that suits your preferences and the type of BBQ you’re aiming for. You can read my whole post about Types of Charcoal Here. It’s a great place to start your BBQ journey.
Set Up Methods
How you build your fire initially has a huge impact on how well your fire burns, how long your fire lasts, and how consistently you’re able to heat your smoker. Here are a few popular methods to get you started. Some of these methods work better in different types of cookers, so you may need to try a couple of things to see how your particular smoker reacts.
In nearly all smokers, your best bet is to use a hot bed of charcoal to provide your main heat and then build on top of that with wood splits or chunks to keep the heat rolling and add in smoke.
The Minion Method
One popular technique for maintaining consistent temperatures over an extended period is the Minion Method. This works particularly well for kettles, drums, or ceramic-style smokers where the heat source is directly under the food.
Here’s how it works:
- Start by filling the base of your charcoal chamber with unlit charcoal. Some people take this a step further and stack each piece of charcoal like dominoes so they know there will be more even heat.
- Create a hole in the center of the unlit charcoal, so the charcoal loops around the exterior of the chamber. Dump in a few hot coals from your charcoal chimney on one end of the unlit coal bed.
- As the lit coals gradually ignite the unlit ones, the fire will slowly spread, providing a steady heat source for hours. You can add wood chips or chunks to the top of the hot coals throughout the cook, or place them in the unlit coals so they ignite themselves while the fire spreads.
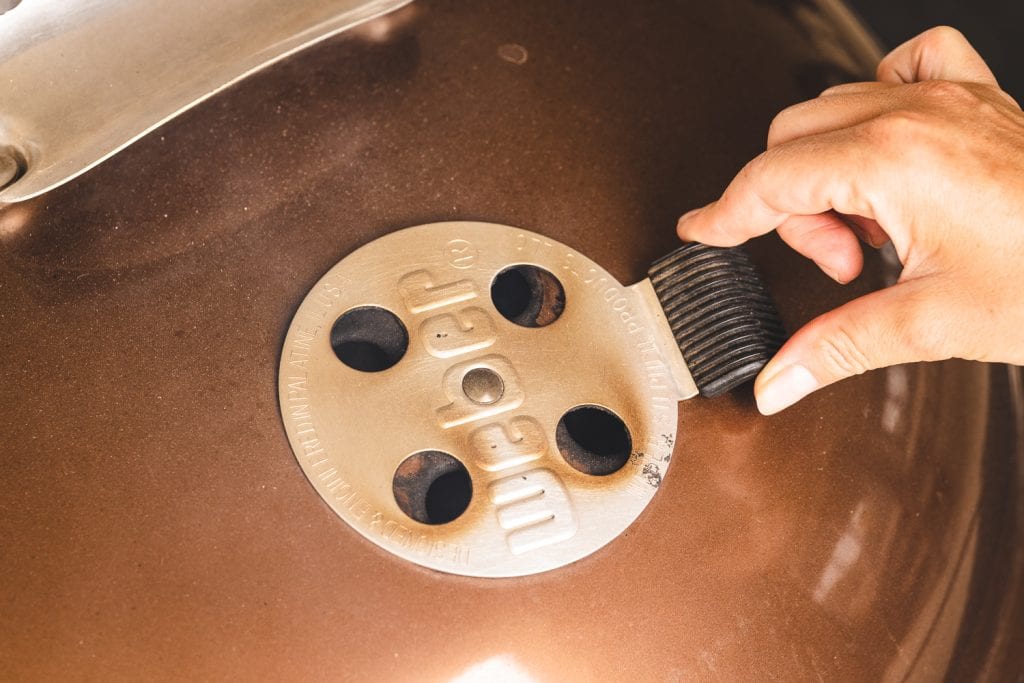
- Adjust the air vents to keep the airflow low to prevent the fire from spreading too quickly.
Perks:
- Little maintenance. As long as your coals are evenly spread, the fire will move through them without you needing to interfere much.
- Can add as much smoke flavor as you’d like while you’re arranging charcoal by inserting wood chunks into the unlit coals.
- Easy to manage temperatures. Since you’re not lighting a whole fire at once, it is easy to reduce the airflow and keep the temperatures low throughout the cook.
Cons:
- Shorter cook time. You can get several hours out of a setup like this, but it’s typically not long enough to cook something like a whole brisket or pork shoulder. If you need to add more coals and you’re cooking on a kettle or drum, you’ll need to remove your food from the grates.
- Heavy smoke flavor. I’m not a huge fan of the flavor of charcoal smoke on ignition. I find it heavy and occasionally acrid. Since the coals in the minion method are constantly in a state of igniting new coals, you’ll generally taste heavier smoke and see thicker smoke coming from your vents.
The Log Cabin Method
This method is most common in offset smokers where the firebox is adjacent to the cooker itself. It consists of a large bed of hot coals for getting the smoker up to temperature and stacked wood splits for smoke and fire maintenance.
Here’s how it works:
- Start by lighting a chimney (or two, depending on the size of your smoker) of charcoal. Once they are starting to ash over, dump them into the firebox of your smoker.
- Adjust the air vents so the charcoal stays lit and begins heating the smoker. You can always add another chimney of coals to help the smoker preheat, but it is hard to reduce the heat in a smoker once it gets too hot, so always start with less and add as needed.
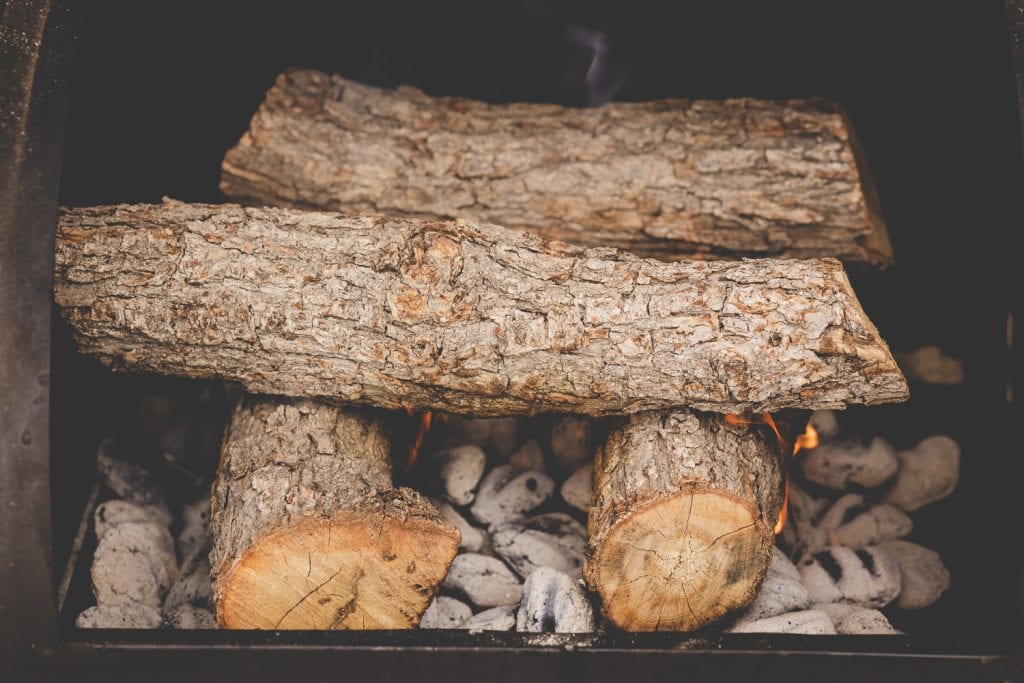
- Once your smoker is holding consistent temperatures you can begin adding wood splits. The log cabin method has you add wood splits in the direction and shape you would use to build four walls. Start by laying two wood splits parallel to each other on top of the bed of coals, then add two more parallel to each other, but perpendicular to the original two. The splits will ignite and burn down, adding both smoke and heat to your cooker. As the wood burns in this reduced oxygen environment, it will add to the base of your hot coals.
- Depending on your smoker, you may need to add 2-4 new splits in the same log cabin pattern every 45 minutes to an hour throughout your cook.
Perks:
- Clean burning fires with real hardwood provide the best smoke flavor to your BBQ.
- Fully lit charcoal as the base provides a solid foundation to maintain heat throughout the cook.
Cons:
- Requires a lot of vigilance and babysitting. You need to be adding logs to the fire regularly since wood burns quite a bit faster than charcoal.
- Longer time to preheat. Since you need a fully lit bed of coals to start the preheating process, it can take a while to get your smoker up to temperature. I usually plan at least 30 minutes of just building the fire and getting the smoke rolling.
How to Control Charcoal Grill Temperature
Achieving the perfect temperature is crucial for a successful BBQ, regardless of which method you use to build your fire. Here are some tips to help you control and maintain the heat:
- Use adjustable air vents. Most smokers come with adjustable vents to regulate airflow. More air means a hotter fire, while less air cools it down. Experiment with the vents to find the sweet spot for your desired temperature.
- Monitor the temperature. Invest in a reliable thermometer to keep a close eye on the temperature inside your smoker. Oftentimes, the dome thermometer that comes with your smoker is inaccurate or placed on the lid, away from where your food is actually cooking. A good remote probe thermometer will allow you to make timely adjustments and ensure consistent cooking conditions.
Heat and Temperature Control
Sometimes, you’ll need to make quick adjustments to control the heat and temperature. Here are a few common methods:
- The water pan. Placing a water pan in your smoker helps regulate the temperature and adds moisture to the cooking environment. It acts as a heat sink and prevents temperature spikes.
- Foil-wrapped bricks. If you’re looking to retain heat for a long smoke, try wrapping bricks in aluminum foil and placing them in your smoker. The bricks absorb and radiate heat, ensuring stability.
- Adjusting the vents. As mentioned earlier, tweaking the air vents can fine-tune the temperature. A small adjustment can make a significant difference, so be patient and observant.
Remember, practice makes perfect. Each smoker is unique, and it will take a few attempts to get familiar with your equipment and its quirks. Don’t get discouraged if your first few BBQ sessions aren’t flawless. Keep learning, experimenting, and adapting, and you’ll soon become a backyard BBQ hero.
So, grab your apron, gather your favorite rubs and sauces, and start your journey toward BBQ greatness. With the right charcoal, temperature control, and fuel management techniques, you’ll be serving up succulent and smoky meats that will make your friends and family beg for seconds.
Get ready to ignite your passion for BBQ, one perfectly cooked piece of meat at a time. Happy smoking, folks!


You have some very interesting point here. I have had my original Weber Performer grill for about 25 year. And I never thought about the bricks. Thanks for the help.